
Carving a Mouse | The Teaching of Whittling
Our woodwork program has shown a great amount of flexibility in creating projects that have shifted from going to the wood shop to working in the classroom. A full reassessment of the tools that can be used in the classroom, applicable safety measures, and the timeline of each project, among other things, took place.
In this project, offered to different classes, the eighth grade students are using whittling knives, whereas the fourth graders are using needle rasps. At Steiner, woodworking is officially introduced in fourth grade. The children begin with the use of a needle rasp and later in the year, as they build their skills, they have the opportunity to work with carving knives.
Our teacher, Mr. Liberman, documented the step-by-step process in a woodworking blog for “Tools for working wood”

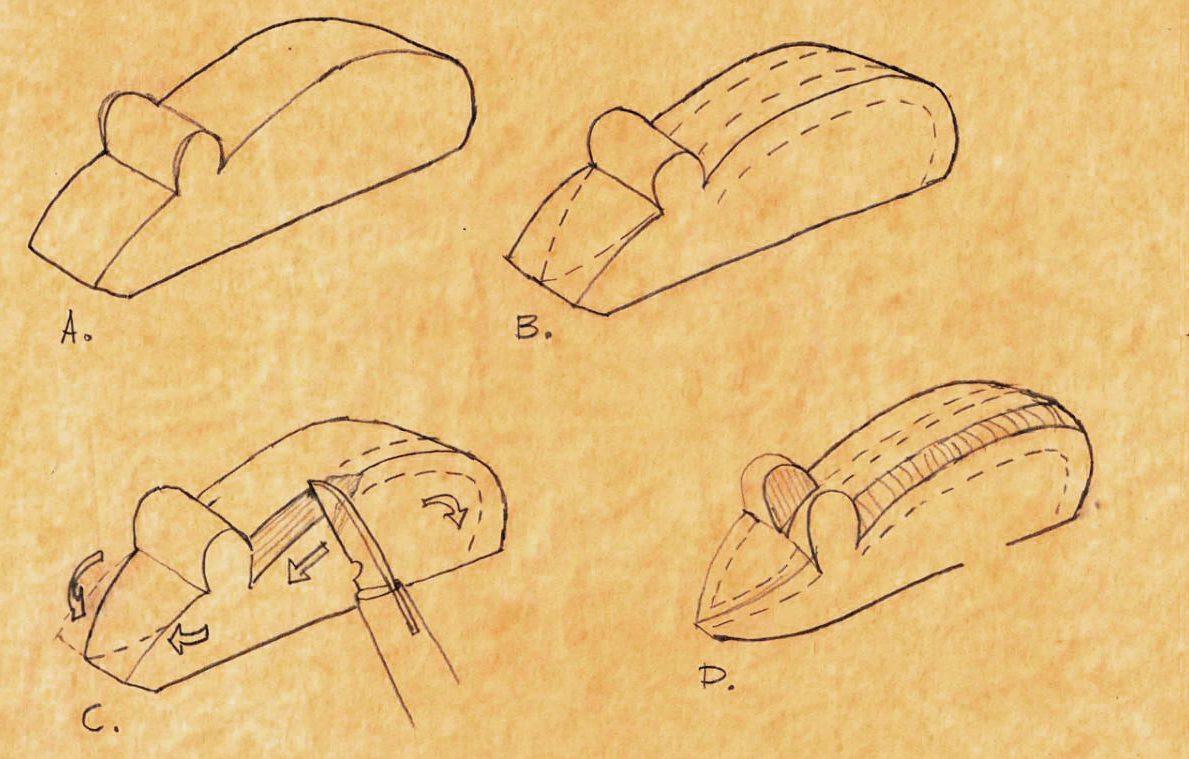
“Why a mouse you might ask? Well, after sketching and trying a few animals I concluded that carving a simple mouse would be a great starting point for animal whittling. A mouse is a relatable animal that many find cute. The shape of the mouse resembles that of a teardrop. Its oblong shape provides solid fundamentals to train the young hand in whittling. A mouse blank can be conveniently held by hand or be supported on the lap, and it has plenty of curved surfaces to hone the student’s skills on.
The mouse’s back and torso provide an opportunity to learn the importance of carving downhill with the grain, and yet the animal shape is rudimentary and forgiving enough in case the student makes an against the grain mistake. Furthermore, the rodent’s ears bestow us with both support and protection for our digits when working on the snout. And, lastly, carving the mouse’s inner ear allows the student to experience using the knife (or a gouge) in hollowing out via a delicate procedure that is done once everything else is completed.”
